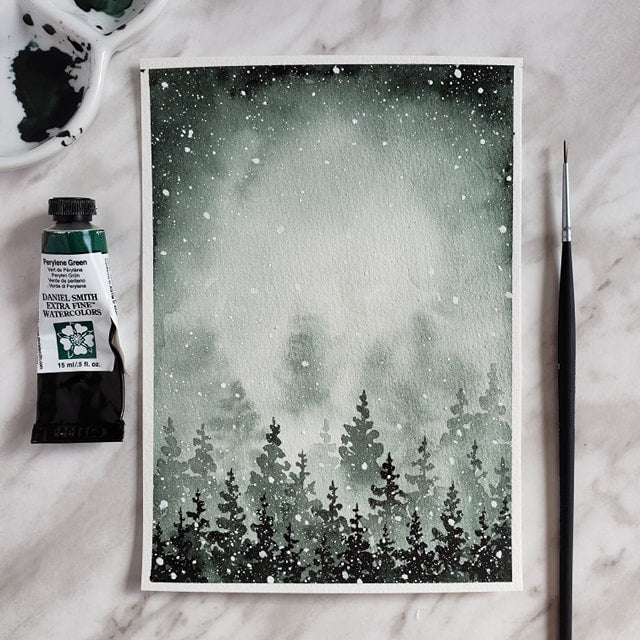
Want to paint some happy, snowy trees? Forest painting enthusiast Kristin Miller @forestfoxart offers this beginner tutorial on how to paint a delicate, winter forest scene in the latest Bee Paper blog.
By Kristin Miller
This blog will cover the basics of how to paint a snowy pine tree landscape in watercolor. I will go over the supplies needed, as well as the step by step process to complete the painting.
Materials needed for your painting:
Paint: Your favorite green watercolor paint will do for this. I will be using Perelyne green, but some other good choices are Sap Green or Prussian Green. You will also need either white gouache paint or white acrylic ink.
Brushes: Flat Wash brush, Round brushes in sizes 10 and 4, a Liner brush in size 10/0 and an old paintbrush that will be used to make the white snow. The brush sizes are just a suggestion. As long as you have a wash brush, a smaller and larger round, and a liner brush for details it will be fine.
Paper: Bee Paper 100% Cotton Watercolor Paper
Other supplies: Palette for mixing and diluting your green paint into 3 different shades. Masking tape, water, a clean paper towel or cloth, and a board or clip board to adhere the paper to your drawing surface.
Step 1:
Before you even start painting, you need to set up your paint and paper. The first step will be to get your paint ready in the palette. We will only be using one tube of green paint for this painting. With watercolor, you can change the opacity of the paint with the amount of water you use. In the palette, you can mix three different shades of the same green color by adding more water for the lightest shade, and less for the darker shades. To set up your paper, tape it down on each side of the board. Now you are ready to start painting.
Step 2:
Using your flat wash brush, wet your entire page of paper with water. Next, use your larger round brush with the lightest green shade to make some faded tree shapes for the background. They don’t have to be perfect. The trick here is to have a nice, misty-looking background. Also, with the same light green, bring the color up all around the edges of the page, for a cloudy, misty background look.
Step 3:
Let your painting dry a bit before you start this layer. Use your smaller round brush to repeat the previous step, but with your second darkest green shade. You want your trees to have a little more of a distinct tree shape, but to still have a bit of a misty look to them. For this step, I like to have some trees more defined then others as I get closer to the bottom of the page.
Step 4:
It’s important to let your painting dry before starting this step, so you don’t lift the paint from the first two layers you’ve already finished. The final tree layer will be closest to the bottom of the page and will be painted with the darkest green shade. The trees will be very defined and detailed compared to the previous layers. For this layer, I like to paint some of the tops of the pine trees with the small liner brush, this gives them nicely defined, pointy tree tops.
Step 5:
The last detail to add to your snowy pines painting is the snow. Take your old brush and mix up the white gouache or white acrylic ink with a bit of water. Then just tap your brush over the page wherever you want the snow to fall. You can have as much or as little snow as you like!
I hope you enjoyed this tutorial and it helps you paint your own snowy watercolor forest landscapes!
Follow Kristin!
Art Instagram: @forestfoxart Photography Instagram: @silverforestphotos


